
Over the past year, Stan has been teaching us to make wood cut prints. Here are some tips and tricks for if you want to make one too! Be sure to check out our shop to own one of our prints today!
First, draw your design on a piece of paper. I used my butterfly drawing from a recent lesson about butterfly kaleidoscopes. Did you know that’s what a group of butterflies is called? Pretty awesome!
Then cut a block of wood to size. We used pine because it’s easier for kids to carve than other hardwoods and we often have scraps from Stan’s beekeeping equipment business.
Put your drawing on top of the wood. Next, use a pencil or stylus to trace or draw your design on the wood. I like to tape it in place so it doesn’t shift while I’m tracing. I used a stylus and it left some cool shallow marks in the wood, even through the paper, which made carving easier.
To carve, we use a mixture of chip carving chisels, a pocket knife, awls, hammer, and more. It’s easiest to carve details if you cut the edge of the shape first, and then chip away at the in between spaces.

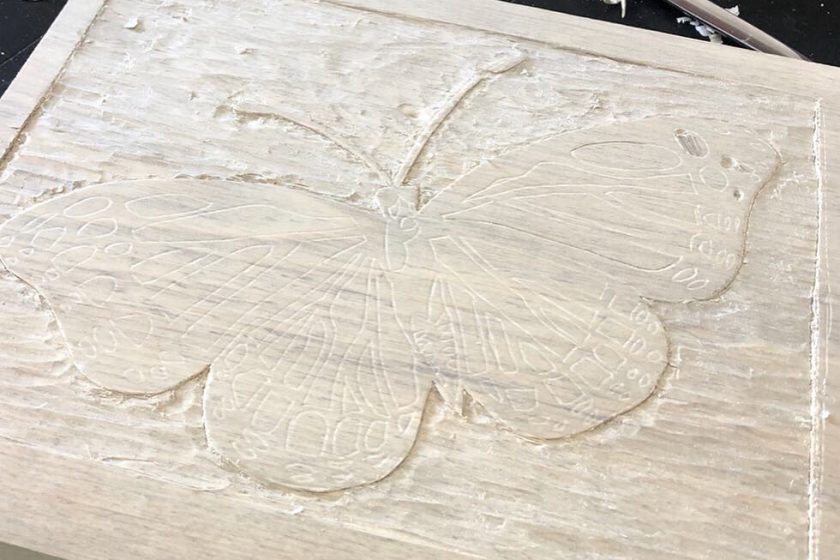

It’s easier to carve side to side. In fact, I couldn’t carve shapes up and down. It’s perfectly imperfect and I really like it.
Once it’s carved the way we like it, we apply ink to the wood block. We used Speedball black washable printing ink (from Amazon). We chose washable to make it easier to manage the mess with the kids. Stan uses permanent ink for his art gallery pieces.

Use a pallet knife to scoop the ink.

Apply the ink to a piece of glass. We spread the ink on the glass with a pallet knife, then roll the ink roller onto the glass to get it evenly coated with ink.

We use an old phone book as a blotting pad. We clean the pallet knife, wipe messes with it, set the roller there, if needed, etc. Then we tear off the top pages and throw them away.
Once the roller is evenly coated with ink, roll ink onto the carving block.

Next, press a piece of paper onto the wet ink, rubbing the back of the paper firmly with a wooden spoon or your hands. Don’t rub so hard that you tear the paper.
After trying several types of paper, I settled on watercolor paper because I wanted to paint in some color later.
Watch as we peel the paper off of the blocks.
Here are some of the painted finished products.

